
To integrate any third-party system with myQuest through Zapier, you have to set up a Zapier account. Then, we will send you an invitation link.
Once the invitation has been accepted, and you're logged in to Zapier with your account, click on "Make a Zap" to get started.
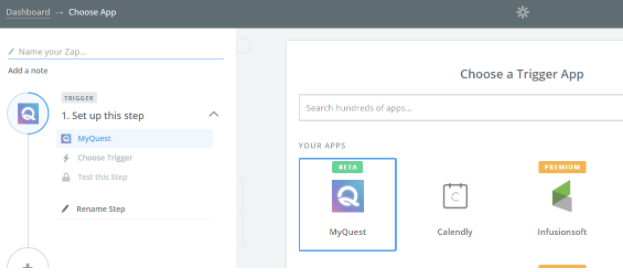
On the first screen, choose the myQuest app.
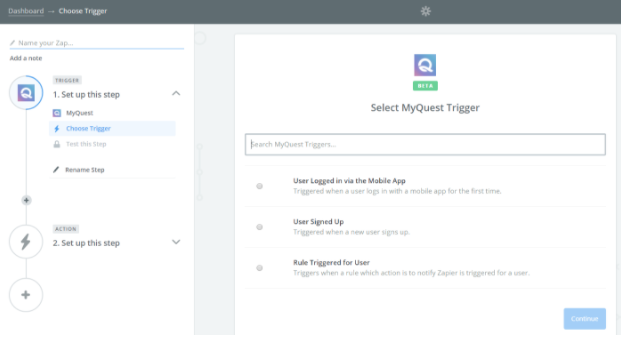
Next, choose the desired trigger you want to use. Information about the triggers which the myQuest Zapier app supports can be found here.
Next, click on “create account”.
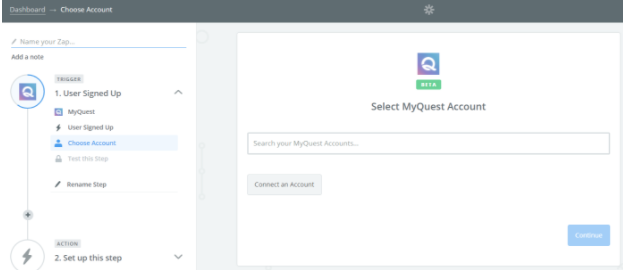
Once clicked, a pop up will show, and you will have to insert the Zapier token you received from your Project Manager. This token will provide you with access to your data on myQuest, so make sure you keep it private! If you need to invalidate it for any reason, please let us know.
When connected successfully, you'll see a screen similar to this screen:
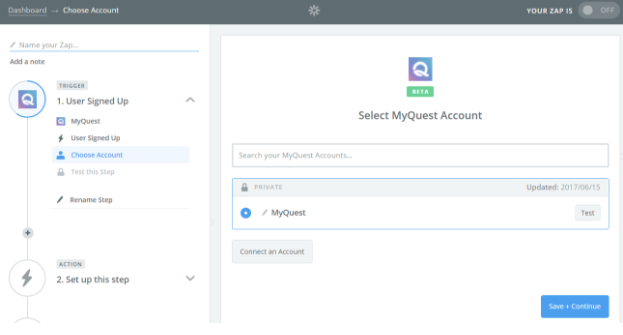
Test the account by clicking on 'Test', make sure you get a "success" green indication, and click on 'Save + Continue'.
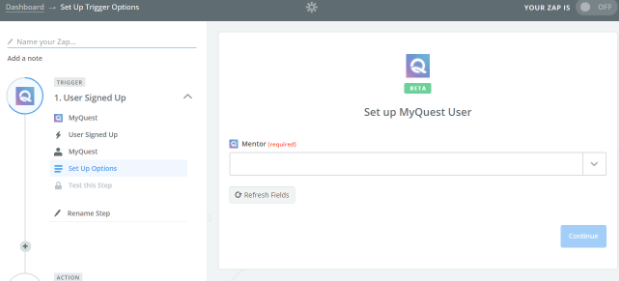
To set up a Zapier trigger for new sign up & new mobile sign up, choose the email address of the Quest mentor for which you’d like to set up this specific Zap.
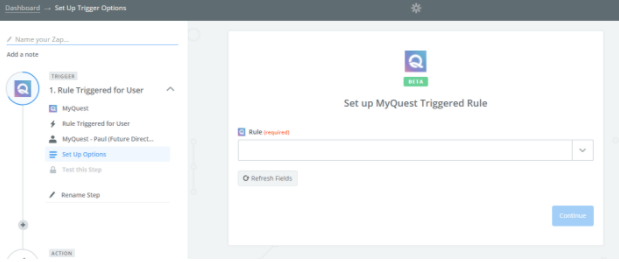
To set up a “Rule triggered for user” (such as Mission completion), choose the rule which you’d like to apply. Make sure to notify your Project Manager what Rule you’d like to have, so that he/she will set it up on the system prior to this Zapier set up.
On the next step, choose any Zapier application you would like to integrate with myQuest (such as InfusionSoft), and act upon the data from the first myQuest step.
Comments
0 comments
Please sign in to leave a comment.